
How to Transfer Text Messages from iPhone to Computer (PC or Mac)

Your iPhone has no "Export" button for Messages, so getting texts onto a computer takes a workaround. The right one depends on what computer you have and how much you need to save: a few messages, one long conversation, or years of history with every photo.
Quick answer: On a Mac, turn on Messages in iCloud so your history syncs, then export it with TextPort for Mac. On a Windows PC, TextPort for Windows backs up your iPhone over USB and saves your conversations as PDF, CSV, or TXT files. Both export whole conversations with photos and attachments included, need no account, and upload nothing: your messages stay on your computer. For a handful of messages, screenshots or File > Print are enough.
Which method should you use?
| Method | Computer | Best for | Attachments | Formats |
|---|---|---|---|---|
| Messages in iCloud | Mac | Getting your history onto a Mac | Yes, in Messages | None (it syncs, it doesn't export) |
| File > Print | Mac | One short conversation | Visible photos only | |
| Screenshots | Any | A few messages | Only what's on screen | Images |
| TextPort for Mac | Mac | Long chats, many chats, full history | Yes, as a ZIP | PDF, CSV, TXT |
| TextPort for Windows | Windows 10 or 11 | Long chats, many chats, full history | Yes, as a ZIP | PDF, CSV, TXT |
If you don't have a computer at all, skip to the no-computer option.
How do I get my iPhone text messages on my Mac?
A Mac can show the same conversations as your iPhone through Messages in iCloud. This is a sync, not a copy: it puts your history in the Mac's Messages app, where you can read, search, print, or export it.
On your iPhone:
- Open Settings, tap your name, then iCloud.
- Tap See All (or Show All), then Messages in iCloud, and turn on Use on this iPhone.
On your Mac:
- Open Messages and choose Messages > Settings.
- Click iMessage and select Enable Messages in iCloud.
Both devices need the same Apple Account with two-factor authentication turned on (Apple's setup guide). A long history can take a while to sync the first time, so leave the Mac on and connected until older messages appear.
Two things to know. Messages in iCloud also syncs deletions: delete a conversation on one device and it disappears from the other. And it only gets your texts into the Mac's Messages app. To save them as files, use one of the next two methods.
Method 1: File > Print on a Mac (short conversations)
The Messages app on a Mac can print a conversation or save it as a PDF (Apple's instructions):
- Open the conversation in Messages on your Mac.
- Scroll up to the first message you want, so the whole range is loaded.
- Choose File > Print.
- Click the PDF menu at the bottom of the dialog and choose Save as PDF.
This is the quickest built-in option for a short chat. It gets awkward with long ones: Messages only prints what it has loaded, so for a conversation that spans years you scroll for a long time first. Timestamps appear only where Messages shows them on screen, attachments other than visible photos aren't included, and there is no spreadsheet format.
Method 2: Screenshots (a few messages)
For a handful of messages, screenshots work on any computer:
- Press the side button and volume up button together to take a screenshot of each screen of the conversation.
- Move the screenshots to your computer: AirDrop or iCloud Photos to a Mac, or connect the iPhone by USB and import them with the Photos app on Windows.
Screenshots are fine as a quick record. For anything longer than a few screens they pile up fast, the text isn't searchable, and cropped images make it easy to question whether anything was left out.
Method 3: Export iMessages on your Mac with TextPort for Mac
TextPort for Mac reads the Messages already on your Mac and exports them as files, so you can export iMessages on your Mac without printing them one screen at a time. It's on the Mac App Store and runs on macOS 14.6 or later.
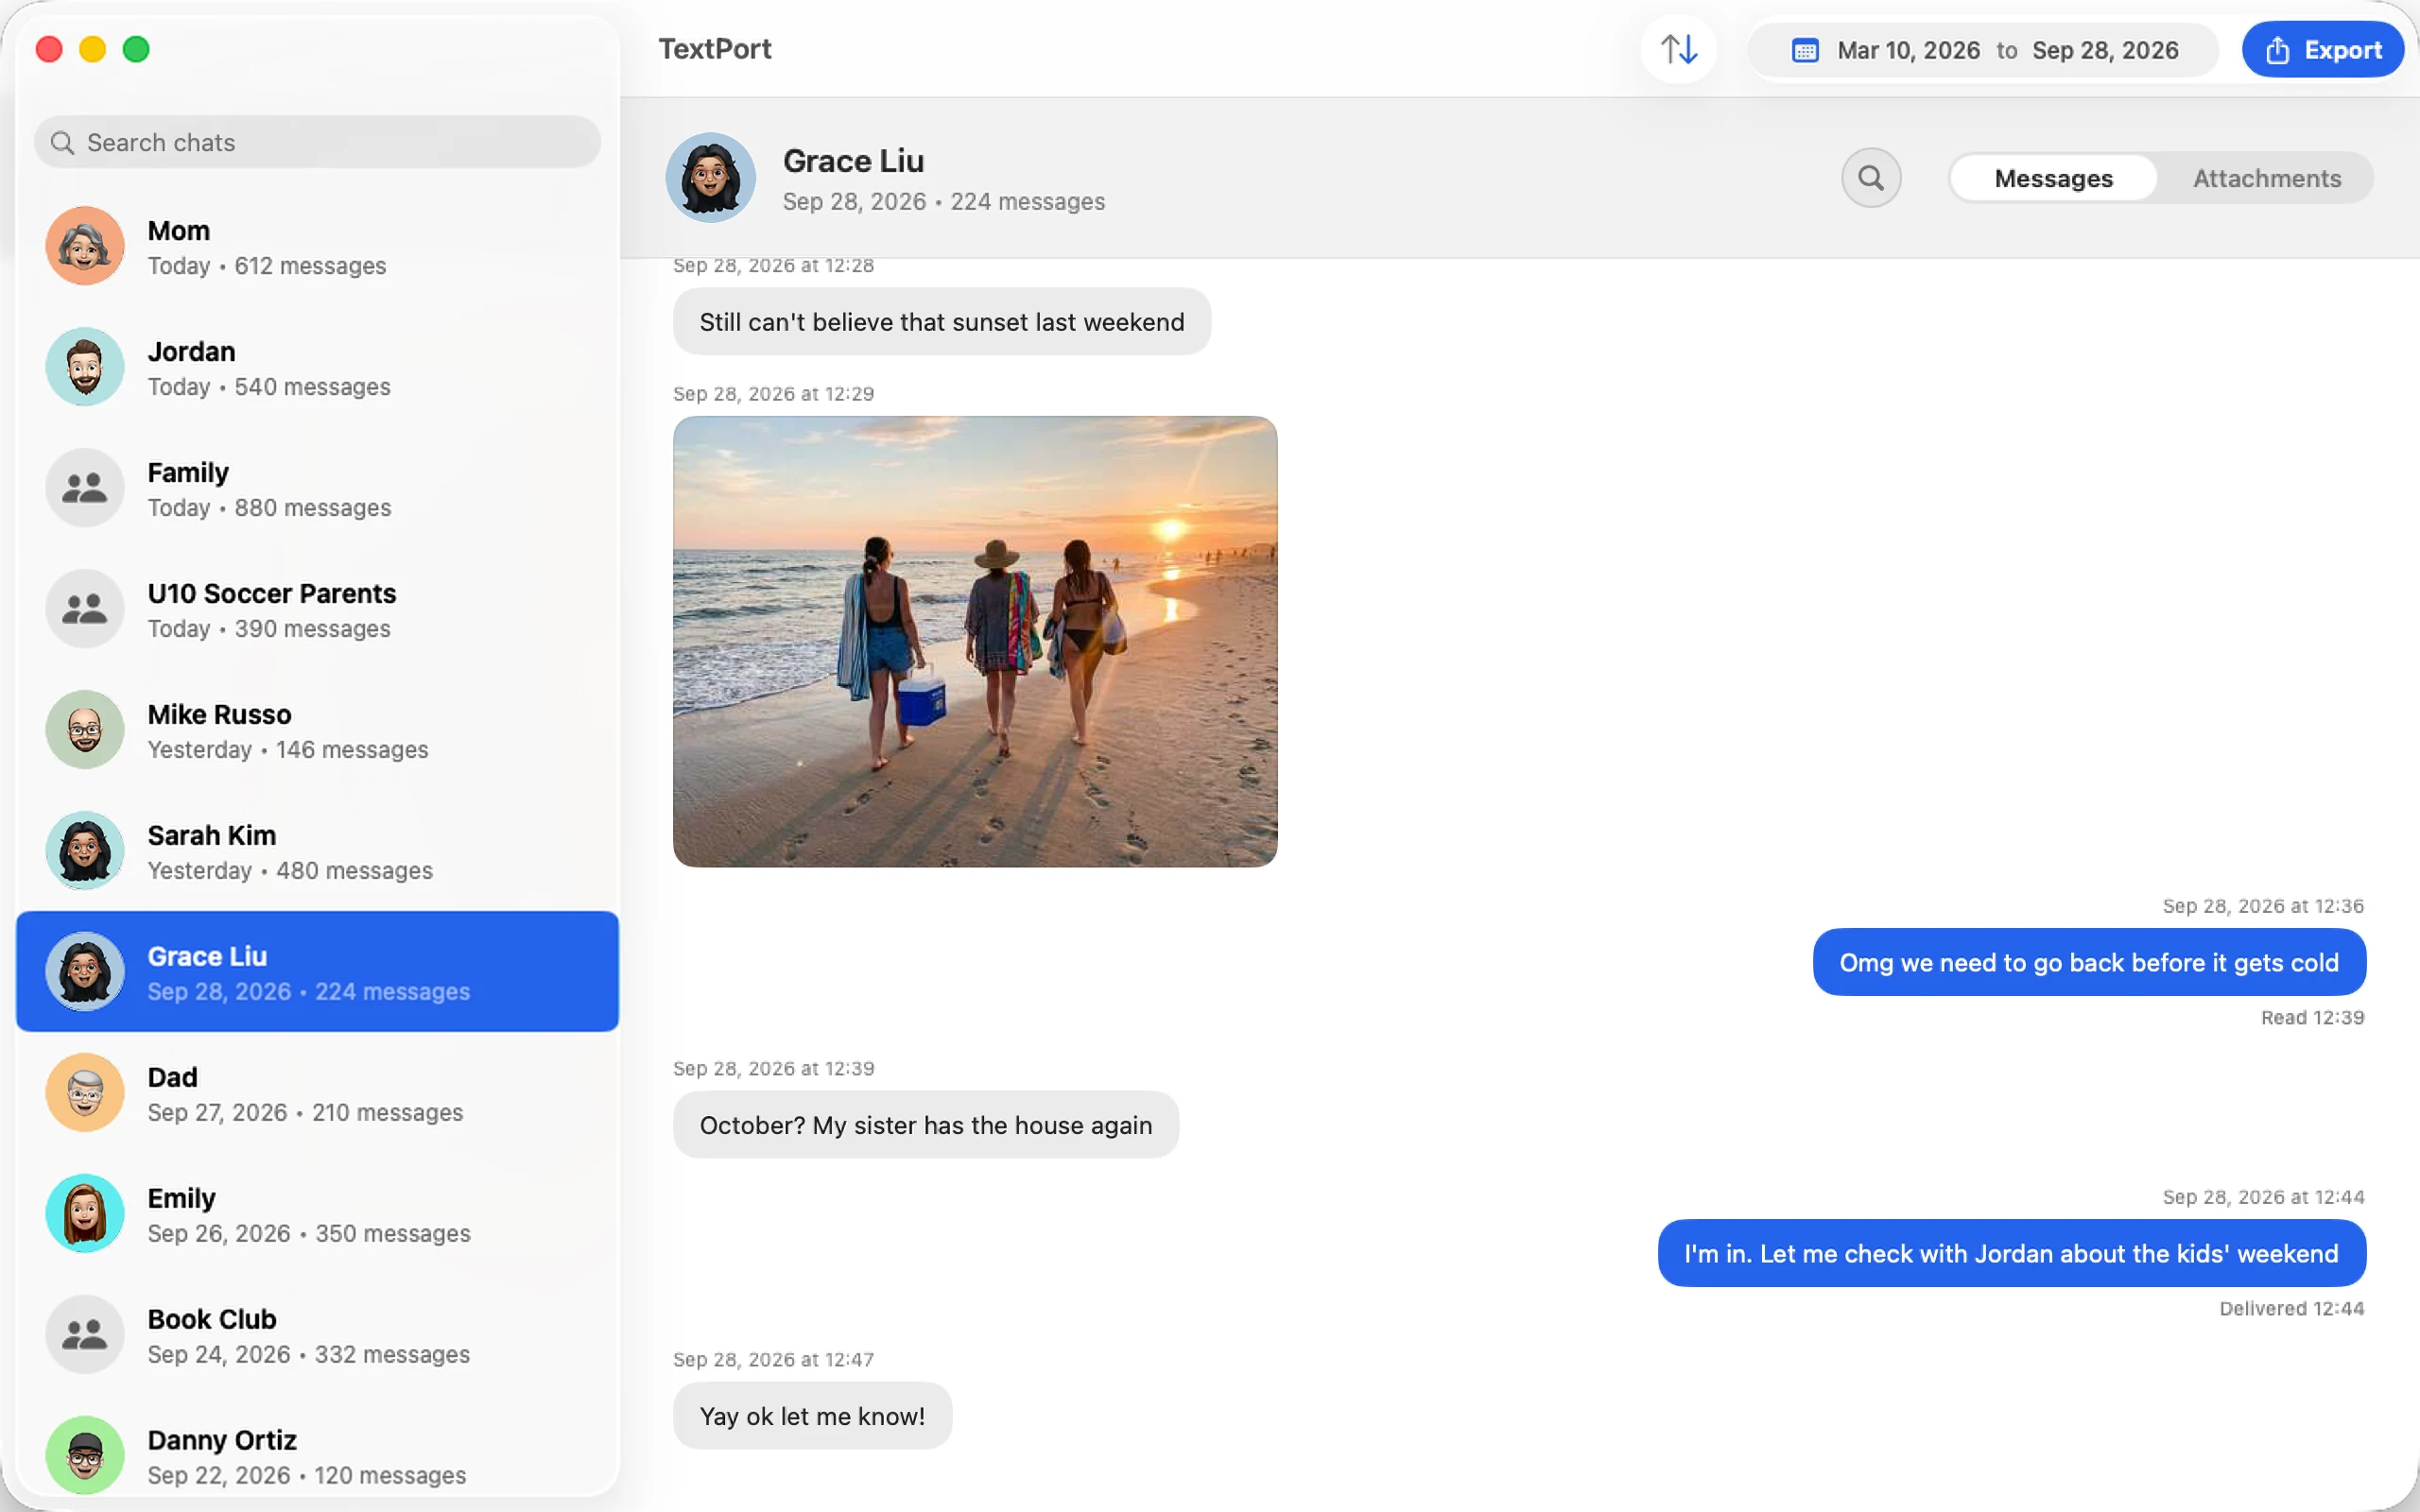
- Turn on Messages in iCloud (above) and let your history finish syncing.
- Download TextPort for Mac and open it. Your conversations appear in a list.
- Pick a conversation, choose a date range if you only need part of it, and click Export.
- Save it as a PDF for printing and sharing, CSV for Excel, TXT, or a ZIP of every photo and attachment in the conversation.
No cable, no backup, and no scrolling to the top of a thread. Every message comes with its sender, date, and time, photos and attachments come along, and nothing is uploaded: there's no account and your messages stay on your Mac.
Method 4: Export iPhone text messages to your PC with TextPort for Windows
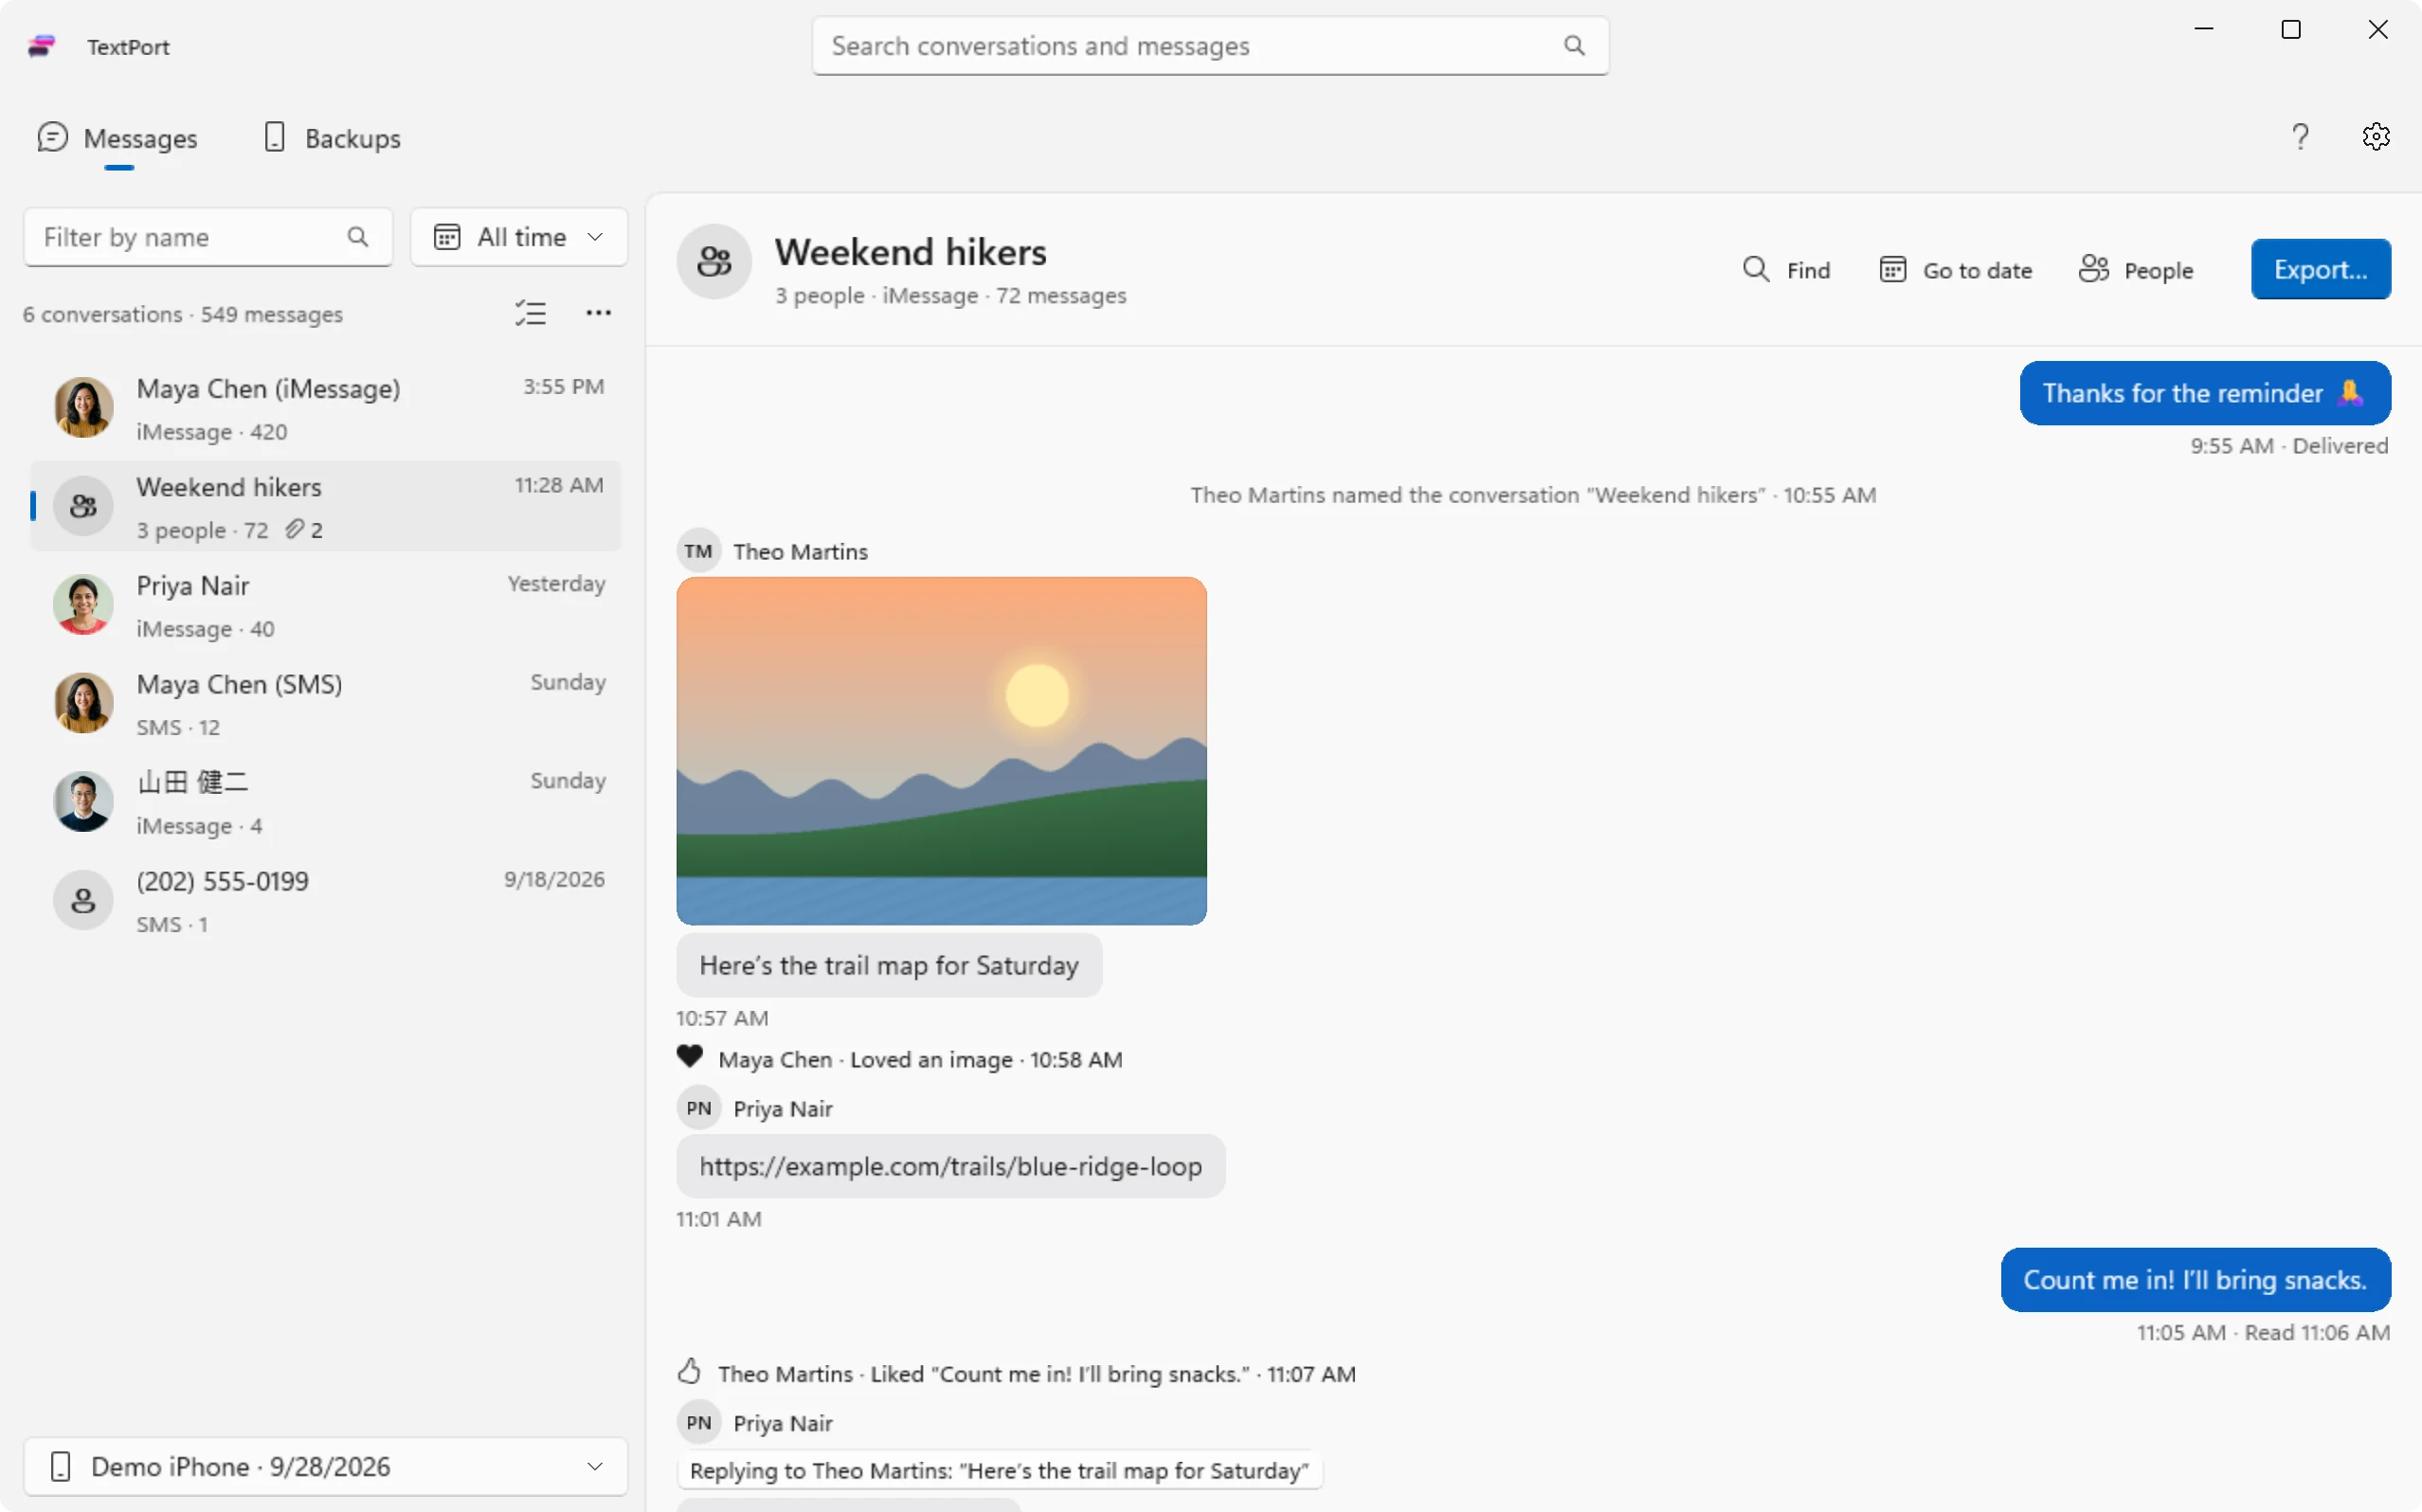
Windows can't sync iMessages, so the way to get them onto a PC is through an iPhone backup. TextPort for Windows handles that for you: it backs up your iPhone over USB, then shows your conversations and lets you export iPhone text messages to your PC as files. It's a signed installer for Windows 10 and 11, and it needs no account.
You'll need:
- A PC with Windows 10 or 11 and enough free disk space for a full iPhone backup.
- Your iPhone and its USB cable.
- Apple Devices (or iTunes on older versions of Windows 10), Apple's free app that lets Windows talk to an iPhone. TextPort checks for it and walks you through setup.
Then:
- Download TextPort for Windows and run the installer.
- Connect your iPhone, unlock it, and tap Trust when asked.
- Start the backup. The first one can take a while on a phone with lots of photos and videos.
- When it finishes, your conversations appear. Pick one, several, or all of them, set a date range if you want, and export to PDF, CSV, TXT, or an attachments ZIP.
Already back up your iPhone with Apple Devices or iTunes? TextPort can open those existing backups on your PC too. It reads unencrypted backups; if yours is encrypted, it shows you how to turn encryption off (you'll need your backup password). Like the Mac app, it does everything on your computer and uploads nothing.
Both desktop apps export iMessage and SMS from the Messages app, including group chats. They don't read WhatsApp, Instagram, or other chat apps.
No computer? Use TextPort for iPhone
If you don't have a computer handy, or the conversation isn't in Messages, TextPort for iPhone does the export on your phone. It imports conversations straight from Messages and turns them into PDF, CSV, or TXT files you can email, print, or save to Files.
It's also the option for other apps. TextPort for iPhone works with WhatsApp, Instagram, Facebook Messenger, Telegram, Signal, and any chat you can screen-record or screenshot. See how to export WhatsApp chats for that flow.
What format should you save your texts in?
- PDF keeps the conversation readable, with names, dates, and times on every message. It's the format to print, email to a lawyer, or keep as a record.
- CSV opens in Excel or Google Sheets, one message per row, so you can sort by date, filter by sender, or search.
- TXT is plain text: small, simple, and easy to paste anywhere.
- Attachments ZIP keeps every photo, video, and file from the conversation at its original quality.
If you need texts for a custody case, a dispute, or another legal matter, a dated PDF can be used in court. Keep the originals on your phone, check the export against them, and read whether text messages can be used in court before you file.
What about paid desktop tools?
iMazing, Decipher TextMessage, and TouchCopy also read iPhone backups on a Mac or PC and export messages. They're full device managers that cover much more than messages. If what you need is your conversations as PDF, CSV, or TXT with their attachments, TextPort's desktop apps are built for exactly that job. Our iMazing walkthrough shows how the paid route works if you want to compare.
The bottom line
To transfer text messages from an iPhone to a computer, match the method to the job. Screenshots and File > Print cover a few messages. For whole conversations or years of history, sync to your Mac and export with TextPort for Mac, or back up to your PC and export with TextPort for Windows. If you're away from a computer, TextPort for iPhone does it on the phone.
Frequently asked questions
-
Yes. On a Mac, turn on Messages in iCloud and your history syncs to the Messages app, where you can print it or export it with TextPort for Mac. On a Windows PC, TextPort for Windows backs up your iPhone over USB and exports your conversations as PDF, CSV, or TXT files.
-
Use a desktop app that exports the whole thread instead of printing it screen by screen. TextPort for Mac reads the Messages synced to your Mac, and TextPort for Windows reads an iPhone backup on your PC. Both export complete conversations to PDF, CSV, or TXT with every attachment in a ZIP, need no account, and upload nothing.
-
You need Apple's software to let Windows talk to an iPhone: the free Apple Devices app on current Windows, or iTunes on older versions of Windows 10. You never have to open it yourself. TextPort for Windows checks that it's installed, then runs the backup and reads your messages from it.
-
Yes. Export the conversations to PDF, CSV, or TXT files (plus a ZIP of attachments) on your computer, then copy those files to the flash drive like any other files.
-
With TextPort for Mac or Windows, yes. Photos show inline in the PDF, and every attachment in the conversation is saved in a separate ZIP file. File > Print on a Mac and screenshots only capture what is visible on screen.
-
Yes, a print-ready PDF with names, dates, and times can be used in court. Keep the original messages on your phone or computer, check the export against them, and talk to your attorney about how your court wants them presented.

Start exporting your messages
Available for iPhone, Mac, and Windows. No computer required.